Här skriver vi artiklar runt SDR och övrig mjukvara som har något gemensamt med satelliter.
Posts and guides about SDR and satellite software related topics.
Greencube Terminal by @CarstenGrn1 Carsten Grøn / OZ9AAR is a packet terminal software for the Greencube IO-117 satellite. This software adds a couple of interesting features compared to the original terminal by Andy, UZ7HO.
Some of the feature are:
Logging to several logging software
Local ADIF search of worked stations
Integrated tracking of your own station and all active stations on the satellite
A smart way of list stations who are calling you
And many others
I highly recommend this software for working IO-117. It is updated often and full info can be found at this page.
@FG8OJ has made an excellent guide of working GreenCube digipeater with IC-9700 and supporting software. I will not write a new guide as Burts guide fully covers everything.
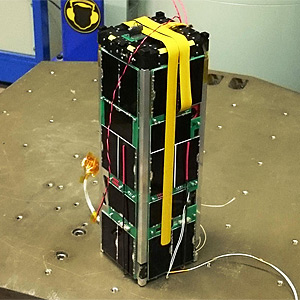
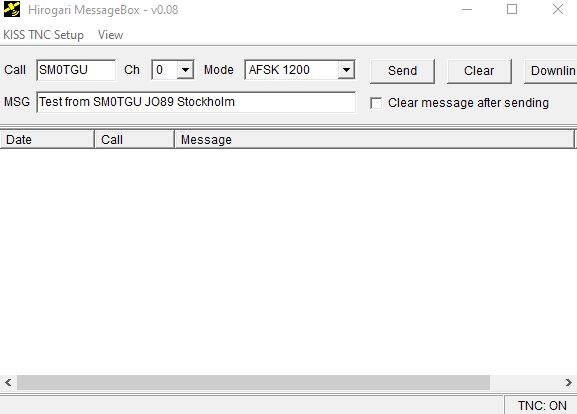
OPUSAT-II, or Hirogari satellite, has the possibility to send, store and receive short AX.25 messages. This is a simple guide how to set up a Windows system to send and receive via OPUSAT-II.
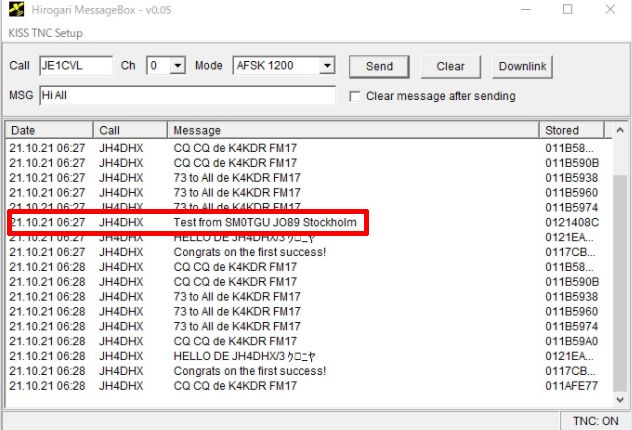
Start MessageBox. It should connect to soundmodem.
When OPUSAT-II is in range, transmit via MessageBox (Send) at 436.500 MHz FM and receive at 145.900 MHz. If you are lucky, your AX.25 is stored in OPUSAT-II:
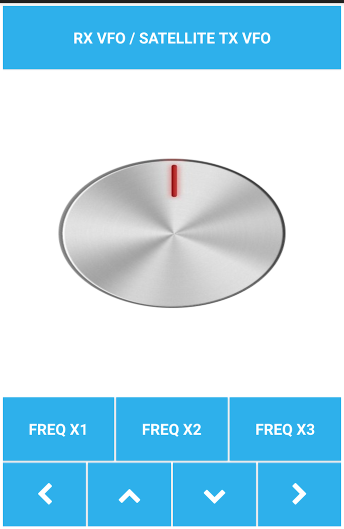
In SDR Console v3 it is possible to control an external radio for transmitting (TX) in the satellite mode – this is called External Radio control. To change frequency you can click on the digits in the control window with the mouse pointer or change with the arrow keys, but it is not possible to use any other shortcut keys or VFO knobs.
This solutions adds a AutoHotKey script for remapping and controlling both RX and TX VFO and a software remote VFO with the help of Unified Remote software. You can use these independent – but best is together. If you only use the AutoHotKey script then you can toggle between the RX VFO and External Radio TX VFO and control with the arrow keys. If you only use the Unified Remote you can control the RX VFO but not switch to the External Radio TX VFO.
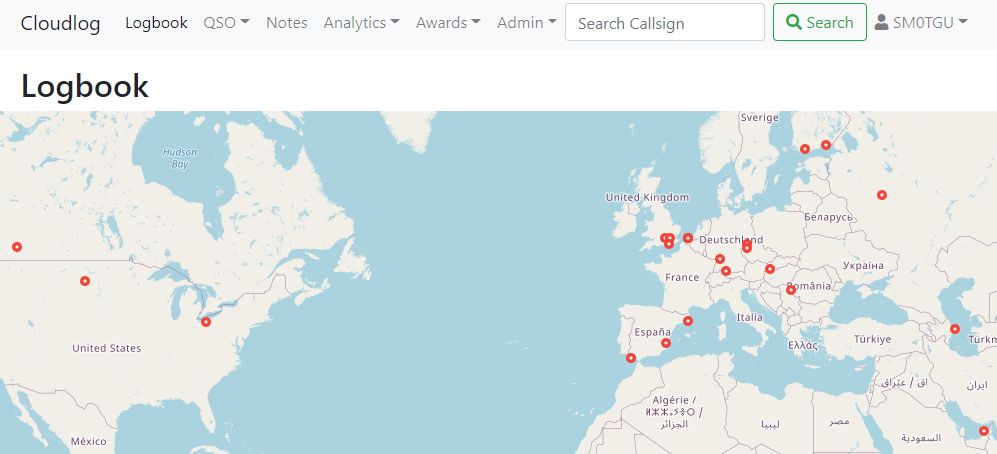
Cloudlog is a QSO logging software developed by Peter (@2M0SQL) installed “in the cloud” – on a web server – and used via a web interface. It is perfect for fast logging of satellite QSOs as Peter is a well known and experienced satellite operator. This is a very short introduction of Cloudlog.
Installation:
Cloudlog can be installed for free (do not forget a donation to Peter!) on your own web server or server host. The installation instructions are very easy to follow. If you do not like to install by yourself you can buy a purchased subscriptions.
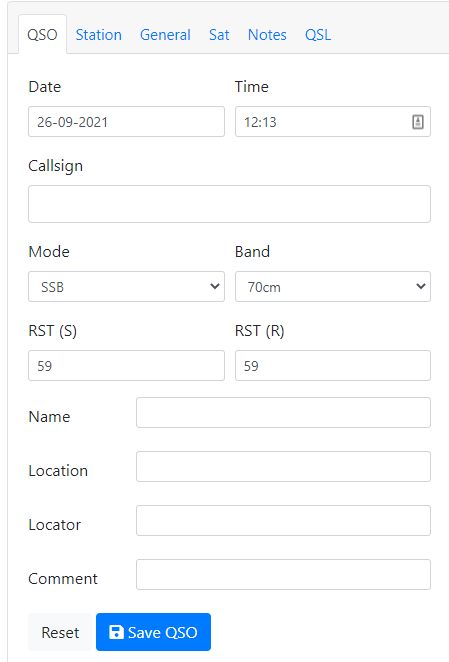
Logging QSOs:
Logging can be done “Live” or “Post”. As I still using a pen for writing down my contacts, I use the Post QSO.
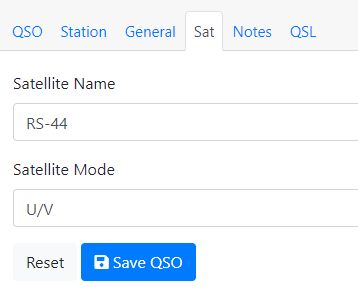
Cloudlog is fully prepared for all type of satellites. All settings are saved for the next QSO you would like to log, so if you are doing a lot of contacts over one satellite post-logging goes very fast.
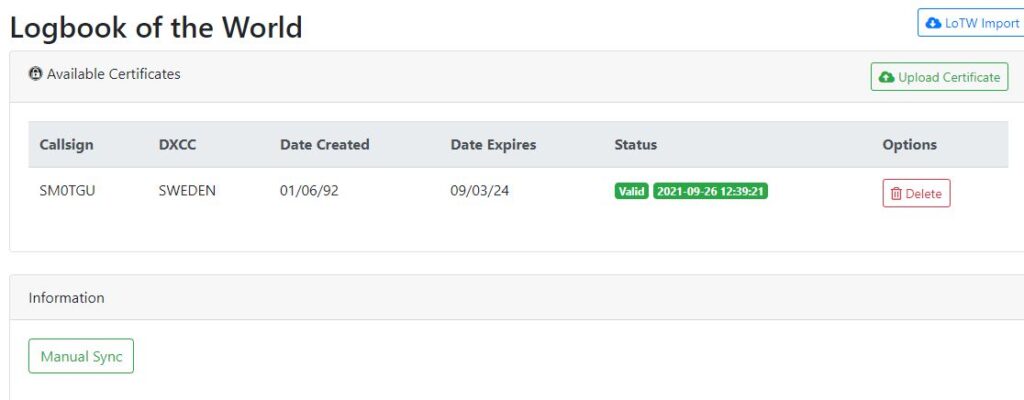
Sync to LOTW
Syncing to LOTW can be done via script or manually. I’m using the manual sync and it is working perfect. You can also see if you get a confirmed LOTW contact in Cloudlog.
This is a simple guide for working FT4 mode via satellite with the help of SDR-Console software, a SDR receiver and Icom IC-705 as transmitter. The IC-705 can of course be replaced by any other radio that can be controlled via OmniRig.
I have also tested this with an ICOM IC-9700 with equal good result.
The “magic” is done by Omnirig. This smart little software can connect several software to one radio at the same time, in this case SDR-Console and WSJT-X.
This guide requires that you have basic knowledge of the following:
WSJT-X and FT4 operation
SDR-Console V3 satellite operation
IC-705 operation (or other radio if you like)
Audio piping between several software
Basic operation with OmniRig
Step 1 – Setup SDR-Console and IC-705 with correct frequency
First you need correct frequency for SDR-Console and IC-705. You can download and use the prepared files from this site. Start SDR-Console and set the downlink (USB) to the satellite you would like to use. Set the IC-705 to the uplink of the satellite, note it has to be LSB-D (LSB with data mode).
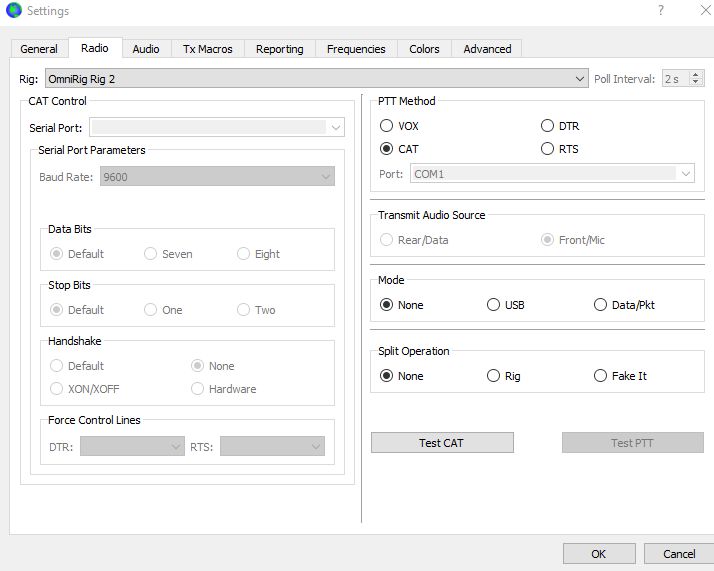
Step 2 – Config WSJT-X
Start WSJT-X and config as following:
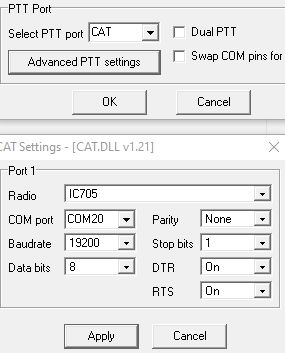
Rig should be Omnirig and your setup for IC-705
Mode should be “None” to avoid WSJT-X to set the rig to USB-D
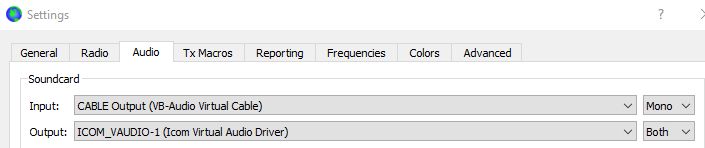
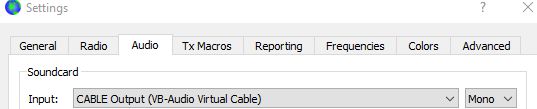
Soundcard Input should be the virtual audio from SDR-Console
Soundcard Output should be the IC-705 mic
Step 3 – Start Satellite External Radio in SDR-Console
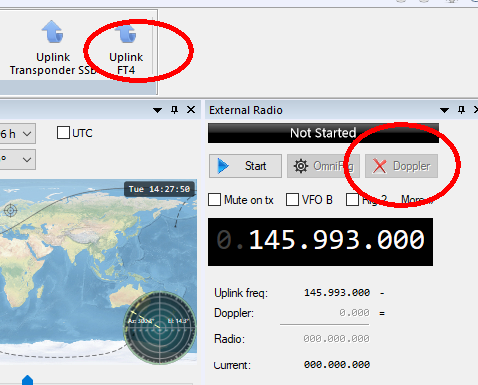
Now start the “Satellite External Radio” in SDR-Console. Select the same OmniRig radio as in WSJT-X. Select the correct uplink frequency and turn on Doppler correction in External Radio.
Now the magic happens! SDR-Console is starting to doppler correct the frequency of the IC-705 and WSJT-X reads the correct frequency from IC-705 in real time!
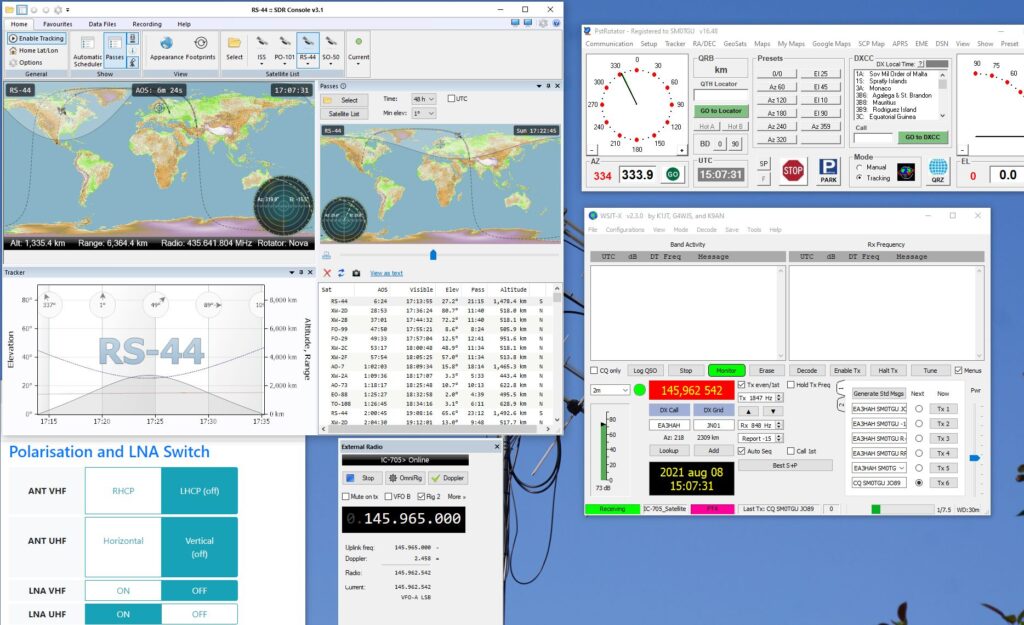
In this image you can see External Radio and WSJT-X with correct frequency:
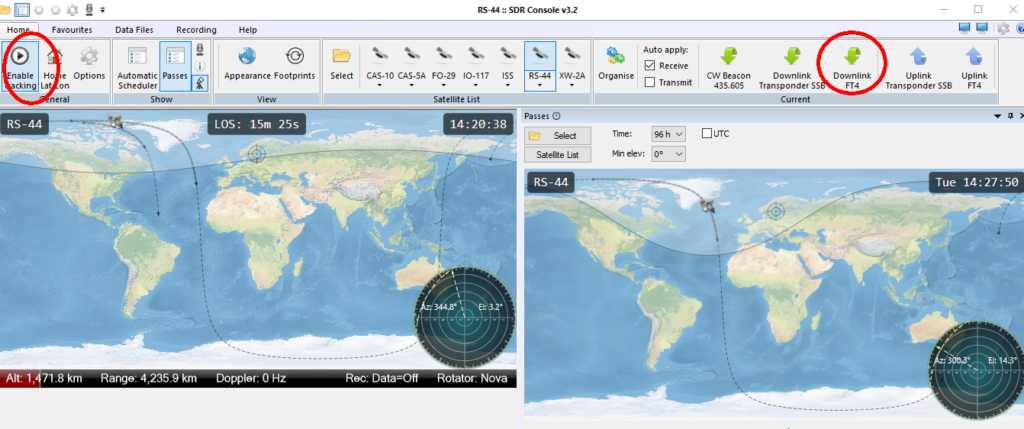
Step 4 – Select correct RX frequency in SDR-Console
Select the correct downlink frequency in SDR-Console and enable Tracking in the Satellite Window for the satellite. Now wait for the satellite to be in your footprint.
Step 5 – Find yourself on the satellite transponder
When the satellite is in your footprint, you need to manually adjust the TX-frequency (at the External Radio window) and RX-frequency, as the SDR-Console software does not have a “tracking RX/TX VFO” function.
Find a free area on the satellite transponder
Turn your TX output to very low
Start transmitting FT4 or use the Tune function in WSJT-X
Adjust TX/RX so that your signal is in your RX bandwidth
Step 6 – Start calling CQ
Now you are ready to start calling CQ and making QSOs! Remember – use the minimum TX power, FT4 is very effective. And be sure not to call over a CW or SSB station.
How to use a 2nd instance of WSJT-X for RX of your own FT4 signal
If you would like to check your own FT4 signal (for testing and learning) it is possible to start a 2nd instance of WSJT-X as receiving only.
Create a new configuration in WSJT-X where Radio->Rig should be set to None and Audio Input should be the piped audio from SDR-Console. Save it to a name of your choice {your_configuration_name}
After you have started WSJT-X for the TX (see above) start a 2nd instance with this command in a cmd window: {path_to_your_wsjtx}wsjtx.exe –rig-name={your_configuration_name}
Now when you TX your FT4 signal the 2nd instance will decode your own signal. See the example below:
Finally, below is a recorded video of a test via satellite AO-73 decoded with a 2nd instance. If you have any questions about this setup please contact AMSAT-SM (Lars SM0TGU) at info@amsat.se